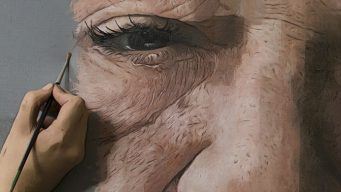

In fact, painting is still an art, not a science. A real artist will need to always find things that work better than other things. If you are serious about painting with oil and want to make your own masterpiece, you should discover some special oil painting techniques that other artists have used in their paintings to create beauty.
I. Oil Painting Techniques – Simple Tips To Apply:
Oil painting is very flexible. Oil paintings can be used extremely thin in glazes or thick in impasto; they can be transparent or opaque. Here are some useful oil painting techniques that you can make use of to paint wonderful paints.
1. Trying Different Techniques:
 There are a lot of ways that you can make use of to perfect your painting. However, learning them can be overwhelming for beginners. Instead, you should focus on picking up these techniques at the same time.
– Trying using a palette knife: This technique is great for landscapes and creating movement on your canvas. You should scoop up a bit of paint on the bottom edge of the knife, and sweep it across the canvas to create thick layers of paint.
– Using stippling to get small dots: You should use a natural bristle brush (dry often works best), and tap it against your canvas vertically. You can set these dots to build up a more opaque figure.
– Trying creating a glaze: This is when you use a paste of 1/3 varnish, 1/3 terpentine, and 1/3 linseed oil to create a transparent color. You should use this mixture with paint color to create a see-through hue over dried paint.
– Trying to blend your paints: This is the process by which you slowly fade two or more different colors (think of a sunset).
buy bactroban online jersey-hemp.com/wp-content/languages/new/bactroban.html no prescription
To do this, add layers of paint so that they are directly adjacent to each other on the canvas. Then, use flat brush to smooth the paints together, working with the direction of the blend.
You can also try useful techniques for cartoon painting if you have time and be interested in this.
2. Mixing The Paints:
Oil painting takes several days to dry. In fact, you almost cannot mix paint that similar to the previous one again, so you should mix it in large batches and protect it between sessions to ensure that you always get enough right color.
– You should use a color wheel that helps you to find right colors to mix.
buy premarin online jersey-hemp.com/wp-content/languages/new/premarin.html no prescription
It will show tertiary, secondary, primary colors and ways to mix them.
– To make a tone, you should add white to a shade. Tones are the most widely used because they represent most of the colors we see every day.
– To make a shade, you should add black to any paint color.
– To create a tint, you should add white to the paint. This will help to make a more pastel color and brighten it.
– Pure hues are the colors that cannot be mixed with both black or white. You can mix the primary colors to generate secondary colors.
3. Laying Out The Paint:
You should always lay your oil paints out on your palette in the same order, so with time, you will be able to instinctively get a bit of a colour.
To lay out any paint, you will need to sketch the subject you are going to shot. Therefore, you should also learn sketching techniques, such as simple tips to sketch amnimals, flowers, or people.

4. Alcohol:
If you want to clean away a layer of oil paint or oil varnish, use alcohol, which is a powerful solvent.
5. When You Not Sure About Using Spirits:
If you are not sure you should use a bottle of mineral or white spirits to paint with oil, you should put a small quantity of them on a piece of paper and allow it to dry. If it dry without leaving any smell, stain, or residue, it should be fine.
6. Tip For Wrinkled Paintings:
If you see that the paint on your palette dries, it forms a lot of wrinkles, that means you have added too much oil. If you love art, then you should refer the art of tattoo and how to get rid of tattoo natrually here.
7. Do Not Dry The Painting In The Dark:
 You should not dry your oil paintings in the dark. This can cause a thin film of oil to rise to the surface that can yellow it. This can be removed by exposure to bright daylight.
Besides painting with oil, if you are also interested in drawing, you can take part in an online drawing course.
8. Do Not Use Linseed Oil For A White-Blue Paintings:
You should avoid using linseed oil as a medium in whites and blues as it will leave a tendency yellow, which is the most noticeable with light colours. You should also use poppy oil for light colours because it has the least tendency to yellow.
9. Using Linseed Oil For Under-Painting:
You should use linseed oil for an underpainting or in the bottom layers of any oil painting done wet-on-dry as it most thoroughly dries of all the oils that are used as mediums.
10. Pigments:
Pigments containing manganese, cobalt, and lead can speed up the drying process. They can be mixed with other colors to accelerate the drying process of the painting and are ideal for under layers.
If you are also interested in manga drawing, you should learn simple ways to be a manga artist.

11. Avoiding Ivory Black:
You should avoid using Ivory Black for a sketching or underpainting as it will take more time to dry than other oil paintings.
12. Focusing On The Proportion:
The average oil proportion should be increased for each subsequent layer in your oil painting because the lower layers absorb oil from the layers on top of them. If the upper layers dry faster than the lower ones, they can crack.
13. Rinsing:
You should remember that you could paint with oils without using brush pressure and solvents to thinly spread the paint out, just oil as a medium and to wash off your brush.
II. Finishing A Painting:
 1. Correcting Mistakes:
You will get about 3 days to interfere any mistake, fix, or totally remove it by using a damp rag. Before deciding to complete your painting, you should look at the whole painting to see whether or not you should make some changes.
2. Saving Unused Paint:
If there are several of unused paintings in your room, you should save them, do not throw them. You should also scoop those paintings into a box or piles on the palette and use a saran wrap to cover them.
Besides, if you want to paint or draw people, you can learn simple tips to draw a portrait.
3. Cleaning The Paint Brushes:
If you let the brushes that you used to paint with oil dried, the brushed will be ruined fast, so you should rinse the brushes right after using them. You should use warm water to rinse your brushes with soap, then, you need to brush the bristles in the opposite direction to your hand’s balm to ensure that all the pigments have been washed off. You should put clean brushes in a cup or jar and let them dry. You should ensure that your brushes get needed air circulation to dry. You should put them in an opened area, for example on a desk or shelf instead of a close drawer or cabinet.
4. Waiting:
 To get your oil painting completely dried, you will need to spend as many as 3 months or even longer if you put many thick layers on your painting. You should put it where it will not be damaged or disturbed and allow it to air dry within a needed time.
5. Adding A Coat Of Varnish:
If your painting has completely dried, you need to cover it with a coat of varnish to maintain the color. When the varnish dry, you can hang your painting on anywhere you want!
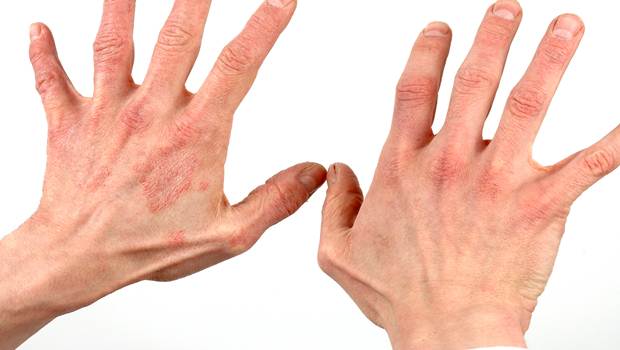
Besides, to keep chasing the art of drawing, you should take care of your hands. Drawing need strong and flexible hands, so if your hands tend to get tired within a short time after starting painting, you should learn useful and simple tips to get stronger hands.
III. Dry An Oil Painting:
1. Where Should You Dry Oil Paints:
You should keep the painting in a place that has room temperature to let it dry more consistently and to avoid cracking. You should try not to let the paint dry outside or any place that is too cold or damp. This will lead to a longer drying process.
buy amoxicillin online jersey-hemp.com/wp-content/languages/new/amoxicillin.html no prescription
If you live in a humid climate area, you should use a dehumidifier next to the painting to make it dry faster.
You should make sure that after 24 – 48 hours, even if your painting seems to be dried, your still need to handle it carefully.

Besides, you just can make a masterpiece if you get comfortable mind. Thus, you should free yourself from stress before drawing or painting anything.
2. Do Not Use Fan Or Hair Dryer To Dry The Painting:
Oil paintings are very great but it will take an extremely long period of time to dry. In fact, you should not do things, such as using a fan or a hair dryer to speed up the drying process. You should remember this last one in oil painting techniques I give you today and do something interesting and useful for you during the waiting process.
Besides, you should also learn useful tips to draw to upgrade your drawing skills.
All of the above oil painting techniques are proven good for a lot of people out there. I have studied them for a long time, and now, I am glad to share them with anyone who desires to find out simple oil painting tips.
If you feel the oil painting techniques I offer in this article are really useful for your current expectation, just feel free to leave all your comments/feedbacks at the end of this post. We appreciate your contribution and will respond all as soon as possible.
Want More Content Like This In Your Inbox?
ALSO ON VKOOL


- Top 15 easy stair exercises at home
- List Of 14 Best Picnic Basket Ideas For Everyone!
- 14 Speed Reading Techniques – Smart Ways For Comprehension
- How to remove moles naturally at home – 6 tips
- How to decorate your house like a designer with low cost
- Unguardable Training System Pdf Review – Does It Work?
- How To Treat Sex Addiction At Home: 7 Useful Tips
- 17 Reasons Why You Will Never Be Rich


 Top 10 Reasons To Quit Smoking Cigarettes
  The new four magic moves review – does this golf course work?
  Vertical Mastery Pdf Review – Can Jack Woodrup’s Course Work?
  Rapid Response Goalie Training Download Review – Is It Reliable?
  Forex automoney review – will Mark’s system work?
  Learn More Study Less Pdf Review – Does Scott Young’s Guide Work?
  24 Health Benefits Of Positive Thinking Attitude In The Workplace
  14 Ways And Tips On How To Be Mentally Strong In Life
  Sleep disorders treatment – 15 tips and remedies
  How To Prepare For An Exam Effectively – Top 13 Ways Revealed!