Believe it or not, many people have made money from photography because they have the secret of how to take pictures of stars. Learning how to take pictures of stars at night will be made easily after reading this article. You will be exposed to those essential tips for taking pictures, that will help you produce awesome stars photos that you have ever dream for. If you are an enthusiast of astronomer photography, this article is for you.
How To Take Pictures Of Stars At Night With DSLR
1. Plan Your Photo Before Heading Out 
Many of you may wonder how to take pictures of stars at night with DSLR camera when it is so dark at night. The first crucial step before leaving home for night photography is to plan to get as far as possible away from your town.
www.playavistaorthodontics.com/wp-content/languages/new/doxycycline.html
By going to an area without light contamination, you will avoid getting lackluster star photos. Light contamination comes from street lights, headlights, houses, cars, flashlight, etc. Mostly anything produces light will jeopardize your attempts. Therefore, plan to get out of town and find an elevated point.
The next thing you should do in order to achieve wonderful night shoots is to plan ahead. You would want to see the scene in daytime, plan it out and practice taking pictures with it. If you show up in the middle of the night and expect to get the most stunning photos, stop hoping as it never happens. Generally, anyone wants to take pictures of the stars has to show up about half an hour before the sunset to make sure they have plenty of time to wander around and find the perfect spot. Before committing to the night photo shoot, make sure you have in hands these two important pieces of information:
– Moon phases.
– Clear weather.
It is highly recommended that you download the free and handy Planets App, which is available on Android and iOS based phones. These apps are very helpful for those aspiring astronomers as it offers a 3D view of the sky, which makes it easier for you to identify planets and constellations.
2. Prepare What You Need
Learning how to take pictures of stars with DSLR camera is not difficult if you are well prepared. It is obvious that you will need a camera. Well, since you are going to take the star pictures at night, a lousy camera will not help. The market nowadays is filled with tons of good cameras, so please take your time shopping around and get the best camera.
The next important tool that you cannot miss is a tripod, which must be a good one. You are going to face with exposures in a long period of time and even put yourself in weird and awkward positions. Moreover, to get good quality photos, you need your camera to be stable. Nevertheless, it is necessary to invest in a good tripod.
You will also need a camera with manual controls of ISO and shutter speed. Additionally, you should also bring along a wide aperture since you will need a lot of light. There will be nothing to worry about with these pieces of gear. However, there are still a lot of additional accessories that can be added to the list, which depend on your needs and you may take sometimes to consider further.
3. Choose Camera Settings That Suit Night Photography  It is recommended that you use a 30 second shutter speed (which is why you need a good tripod, as mentioned above). 30 seconds is enough if you use an extreme long shutter speed. The stars in your photo will start to look oblong due to earth’s rotation. 30 second shutter speed will barely make the stars look oblong which will not have you noticed unless you zoom all the way into the picture on your computer. Nonetheless, 30 second shutter speed is not something that fits all the night stars pictures. You will need a shorter shutter speed if you have longer lenses. If you use an 18mm lens to shoot on a crop censor camera, less than 15 or 20 second shutter speed is enough. Usually, in landscape photography, to achieve the optimum depth-of-field, you would want to use a high aperture. Many people tend to think because of the far distance between them and the stars, they will need a very high aperture. However, you need to remember that is about how much sharp the picture is, it is not where the sharpness appears. Therefore, the most precise aperture that you need to use is the lowest f-stop you have in hands. By capturing the stars, you are focusing on infinity, so a low f-stop will help you capture dim star light. Photographers usually like to keep the ISO as low as possible to avoid getting grainy photos. However, sometimes high ISO values are necessary for some kinds of night photography to find out where the source of light pollution is and then limit the time the photos need to expose.
www.playavistaorthodontics.com/wp-content/languages/new/priligy.html
That may lead to photos with noise which is inevitable yet can be fixed by using long exposure noise reduction.
www.playavistaorthodontics.com/wp-content/languages/new/acyclovir.html
Long exposure noise reduction is available in most DSLRs that were made in recent years.
4. How To Focus For Night Photography 
In order to find proper focus, a certain amount of contrast is required in every autofocus system. When shooting at night, your camera will have some difficulties in auto focusing properly due to the lack of light. The best solution to this problem is to look around you and find a source of light such as street lights or other light that has the same distance away from you. Then, focus on that light then slowly switch into focus mode on your lens to “manual”. This will help keep the focus where you want for a long period of time.
If you are taking pictures of the stars and having nothing to worry about focusing on the foreground, then perhaps you will want to move the focus all the way out and then slightly come back. By doing this, your lens will focus on infinity which is a good thing in shooting the stars. If the moon is bright and clear on that day, there is nothing to worry about. You can proceed to taking the pictures of the moon from any direction.
5. Mount Your Camera To A Telescope For Better View
When shooting the stars on the night sky, it is not necessary to mount your camera to a telescope since your camera will work alone just fine. However, if you want to capture the image of the moon or a planet, you will need to do that. In order to implement this, you will need a tool named a camera mount. This will connect your camera to the telescope.
6. How To Take The Best Shots
Without relying on the modern photography trick and special effects, you still can produce those stunning star photos. It can be done by stabilizing your camera as firmly as possible. Mount your camera and set the aperture to open. Please always find your most comfortable position and view, set the focus to infinity and hold the shutter open. When shooting bright objects, you will only have to open the shutter from 2 to 10 minutes. The length of time may come up to 20-30 minutes of exposure when it comes to nebulae and distant galaxies. While shooting the stars with the shutter open, it is important to make sure that you do not touch any part of the rig including the tripod, the camera or the telescope. You can avoid or at least minimize the vibration by using a bulb or remote shutter. Then leave the camera all alone. In addition, be careful not to use any kind of flash lights, lighters or any source of light anywhere near your camera during this time.
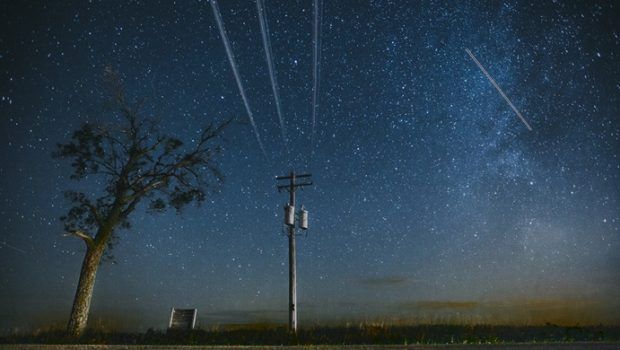
7. Try To Find The Milky Way  The Milky Way is not something that people see on any days with their naked eyes. The artificial lights come from houses, cars, street lights are usually so bright that overwhelm the dim light of the ring around the Milky Way at night. Fortunately, some of the newer DSLRs have an amazing ability of light gathering which helps capture the Milky Way on the pictures easier. It is recommended that you wait until the night when it does not have bright full moon. By doing this, you will have less chances of making the Milky Way appear invisible. The best thing to do is to find a location where it is completely black outside, then the Milky Way will be more visible than ever.
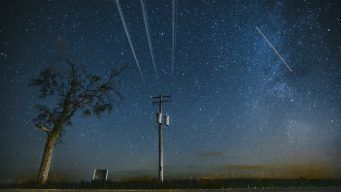
8. How To Shoot Meteors
It is a challenge to photograph the images of meteors, however it is not impossible. All you need are luck and patience. The first thing you should do is to choose a night when the meteors shower is more likely to happen. Mount your camera on a tripod and point it at a fixed direction as instructed above. Make sure you are not including the moon in your shots since its bright will probably overwhelm other stars and meteors.
In this case, a telescope is not necessary, but setting your lens for a wide field of view. Keep the shutter open from 2 to 10 minutes. During that time, one or more meteors will cross the frame if you are lucky. If that does not happen, be patient and try again.
9. Practice Makes Perfect
Practice is the only way that can help you master the technique of how to take pictures of stars with DSLR camera. The availability of wide ranges of modern digital photography will make your photo shooting skill practice much more enjoyable. By tweaking the camera settings, you are able to capture the stunning beautiful star photos.
It is important to keep a log of every object that you have ever captured by giving notes on cloud cover, light pollution, etc. If you are a newbie in night photography, you probably should start with the moon. The big size and its brightness will make itself an easy target to photograph, even in areas with light contamination.
So this is the end of the article on tips of how to take pictures of the stars. Hopefully after having read and applied all these 9 tips, you can learn how to take better photos of stars and please do not forget to tell us what you think about this “how to take pictures of stars at night with DSLR” article by making a comment below. Last but not least, there are also many other helpful photography articles found under the entertainment category from the site vkool.com. Please take sometimes browse through as you may find interesting photography tips that you never know.
Want More Content Like This In Your Inbox?
ALSO ON VKOOL


- How to treat dog diarrhea naturally at home – 7 quick tips
- Top 6 Ways On How To Get Rid Of Mice Naturally And Fast
- Top 13 Basic Skiing Tips For Beginners To Get Started
- Singing Is Easy Software Download Review – Does It Work?
- How to improve your diet and lifestyle with 37 easy tips
- 17 Tips On How To Remove Hair Dye From Skin And Face
- Complete Illustrated Guide To Homemade Wine Review – Mike’s Book
- Benefits Of Smartphones In Business And Education


 Skintervention Guide Review – Will Liz’s Program Work?
 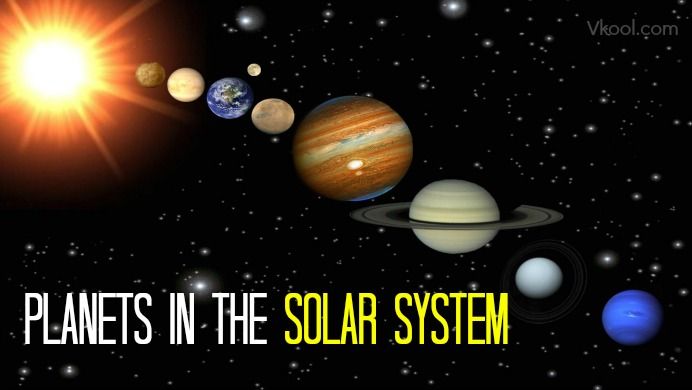 List of planets in the solar system – 9 planets
  Top 13 Professional Communication Skills Revealed!
  Ask Brian Wood Review – Does Brian Wood’s program work for you?
  Golf Swing Speed Challenge Review – Can Alex’s Book Work?
  How to make homemade lipstick with crayons, vaseline, and more
  Pianoforall Review – Is Robin Hall’s Piano Course Useful?
  Rocket Ukulele Review – Does The Couse Work For You?
  How To Avoid Jet Lag On International Flights Naturally
  Fluttermail review – does Simon & Charles’ system work?